How to Customize Your Brand and Booking Page
The Branding settings in Calpace allow you to completely customize the look and feel of your public booking page. By tailoring the logo, colors, messaging, and even the domain, you can create a seamless and professional experience that perfectly matches your brand identity.
This guide will provide a detailed walkthrough of every option available on the Branding page.
1. Accessing Your Branding Settings
To get started, navigate to the Branding section within your account settings.
- From the main dashboard, click on Settings in the left-hand navigation menu.
- In the "Account Settings" menu, select the Branding tab.

2. Your Public Booking Page
At the top of the page, you'll find the URL for your public booking page.
- URL: This is the link you can share with clients to let them book appointments.
- Copy: Click this button to quickly copy the link to your clipboard.
- Preview: Click this button to open your live booking page in a new tab and see how your changes look to a visitor.
3. Logo & Colors (Light and Dark Themes)
This is the core of your visual branding. Calpace supports both a Light and a Dark theme for your booking page, and you can set distinct branding for each to ensure your logo and colors always look their best.
Use the Light / Dark toggle switch to move between editing the settings for each theme.
Light Theme Customization (Default View)
- Company Logo: Click the upload area to select a file or drag and drop your logo. This logo will appear on the light version of your booking page.
- Recommendations: For the best quality, use an image that is 400x200px (2:1 ratio). Supported file types are SVG, PNG, JPG, or GIF, up to a maximum of 5MB.
- Brand Color (Light Theme): This is the primary accent color used for buttons and highlights on your booking page when it's viewed in light mode. You can click the color swatch to use a color picker or enter a specific hex code (e.g.,
#4F46E5).

Dark Theme Customization
- Company Logo: After switching the toggle to Dark, you can upload a different logo that is optimized for dark backgrounds (for example, a version with white or light-colored text). If no logo is uploaded here, the light theme logo will be used by default.
- Brand Color (Dark Theme): Select an accent color that has good contrast and visibility on a dark background (e.g.,
#84cc16).

4. Messaging and Social Links
- Welcome Message: Enter a custom message that will be displayed at the top of your booking page. This is a great place to greet your clients and provide brief instructions.
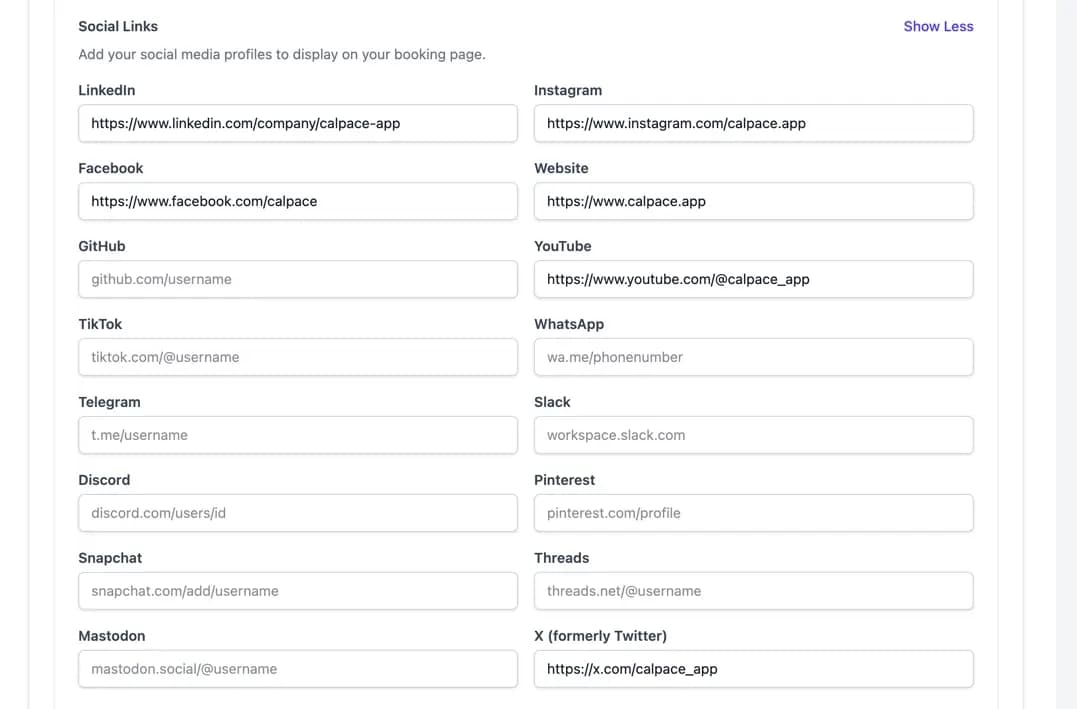
- Social Links: Add the full URLs for your social media profiles (LinkedIn, Instagram, Facebook, YouTube, Website, and X/Twitter). Icons for these services will appear on your booking page, allowing clients to easily connect with you.
5. Advanced Customization (For Technical Users)
- Custom CSS: Add your own custom CSS code here to further personalize the appearance of your booking page. This allows you to change fonts, element spacing, background colors, and more, overriding the default styles.
- Custom JavaScript: Insert custom JavaScript snippets for analytics, tracking, or other functionality. This is commonly used to add tracking scripts for tools like Google Analytics or Meta Pixel.

6. Calpace Branding
- Show Calpace Branding: This toggle allows you to show or hide the "Powered by Calpace" badge in the footer of your booking page. (Note: This feature may only be available on certain subscription plans.)
7. Setting Up a Custom Domain
To provide a fully branded experience, you can use your own domain (e.g., schedule.yourwebsite.com) for your booking page.
- Enter Your Custom Domain: Type the full subdomain you wish to use into the provided field.
- Configure Your DNS Records: This is a required technical step that you must complete with your domain provider (e.g., GoDaddy, Cloudflare, Namecheap).
- Log in to your domain provider's dashboard.
- Navigate to the DNS management section.
- Create a new CNAME record with the following details:
- Type:
CNAME - Name/Host: Enter the subdomain you chose (e.g.,
schedule.yourwebsite.com). - Value/Target:
schedule.calpace.app - Verify the Connection: After saving the CNAME record with your provider, return to Calpace and click the Check Now button. DNS changes can sometimes take up to 48 hours to fully propagate across the internet, so it may not verify immediately.

8. Saving Your Settings
After making any changes on this page, be sure to click the Save Branding Settings button at the bottom to apply them.
The Result: Your Live Public Booking Page
After you have configured your settings and clicked "Save Branding Settings," you can use the Preview button or share your URL to see your live booking page. It is designed to be clean, professional, and easy for your clients to use.

Here is a breakdown of what your visitors will see, based on the settings you've configured:
- Company Logo: Your brand's logo is displayed at the very top of the page.
- Profile Information: Your Profile Picture, Full Name, and Job Title are featured centrally. This personalizes the page and lets clients know they're in the right place.
- Welcome Message: The custom welcome message you wrote is shown directly below your name, greeting your visitors.
- Social Media Links: The social profiles you added in the branding settings appear as a series of clickable icons.
- Timezone Detection: This is a crucial feature for working with clients in different locations.
- The timezone on the left (e.g.,
Europe/London) displays your primary timezone, which is set in your Profile Settings. - The timezone on the right (e.g.,
Your timezone: Australia/Sydney) displays the visitor's local timezone, which Calpace automatically detects. All your available time slots will be shown to them converted into their local time, eliminating any confusion or need for manual calculations.
- The timezone on the left (e.g.,
- Available Services: Finally, all of your active, public-facing Services are listed. Each entry shows the service name, description, duration, and location/method (e.g., Google Meet), allowing clients to easily select the appointment they need.