How to Connect Your Google Calendar
Integrating your Google Calendar with Calpace is a crucial step to automate your scheduling and prevent double bookings. By connecting your calendar, you allow Calpace to check your real-time availability and automatically add new bookings to your personal calendar.
This guide will walk you through connecting your account and managing your sync settings.
Part 1: Connect Your Google Calendar Account
First, you need to authorize Calpace to access your Google Calendar.
Step 1: Navigate to Integrations
From your main dashboard, click on the Integrations tab in the left-hand navigation menu.
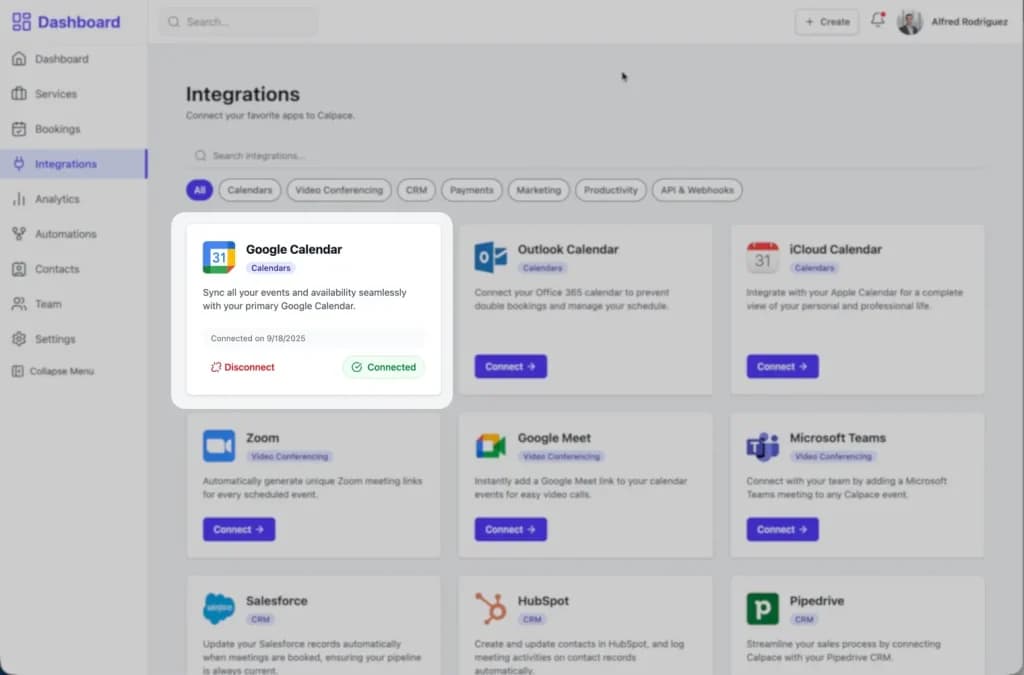
Step 2: Select Google Calendar
On the Integrations page, locate the Google Calendar card and click the Connect button.

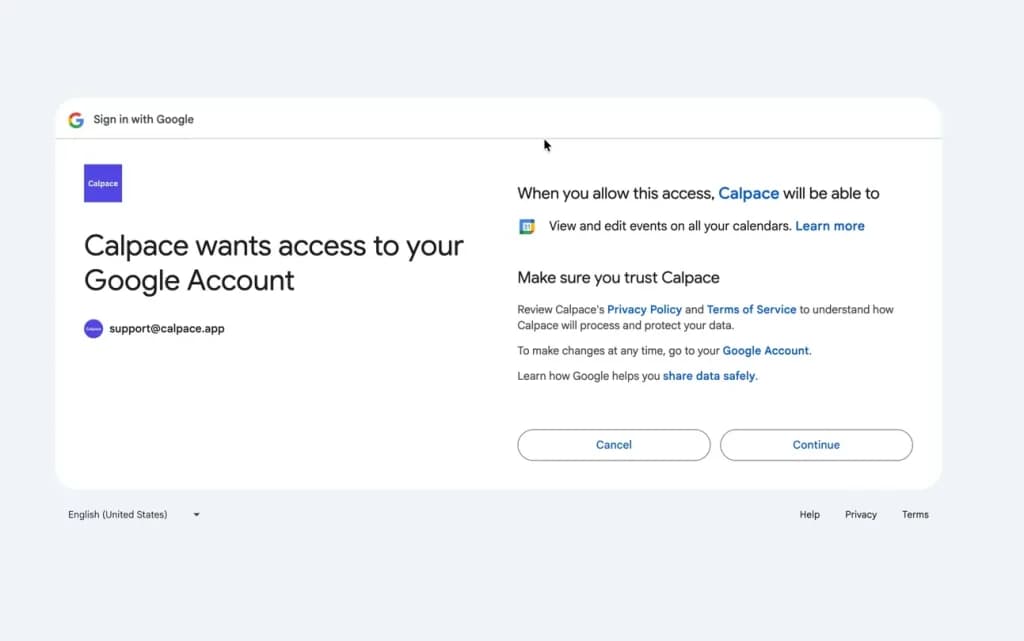
Step 3: Authorize Your Google Account
You will be redirected to a Google sign-in and authorization screen.
- Choose the Google Account you wish to connect.
- Google will ask you to confirm that you trust Calpace and grant it permission to "View and edit events on all your calendars." This permission is necessary for Calpace to read your availability (to prevent conflicts) and write new bookings to your calendar.
- Click Continue to approve the connection.
Part 2: Verify Your Connection
After authorizing, you will be sent back to the Calpace Integrations page. The Google Calendar card will now show that the integration is active. You can see that the calendar is Connected, the date it was connected, and you now have the option to Disconnect it if needed.
Part 3: Manage Your Calendar Sync Settings
Now that your calendar is connected, you can manage how your services sync with it. This ensures that all new bookings are automatically added to your Google Calendar.
Step 1: Go to Integration Settings
Navigate to Settings from the main dashboard menu and then click on the Integrations tab.
Step 2: Configure Your Sync Preferences
In this section, you will see your connected calendars and can manage how your services sync.
- Connected Calendars: This area confirms that your Google Calendar is successfully connected.
- Services Sync Status: This section allows you to manage how services sync on a broad level.
- To ensure all your current and future services automatically sync to your Google Calendar, check the box for Enable sync for all services.
- From the dropdown menu below, select the specific Google Calendar you want to use.
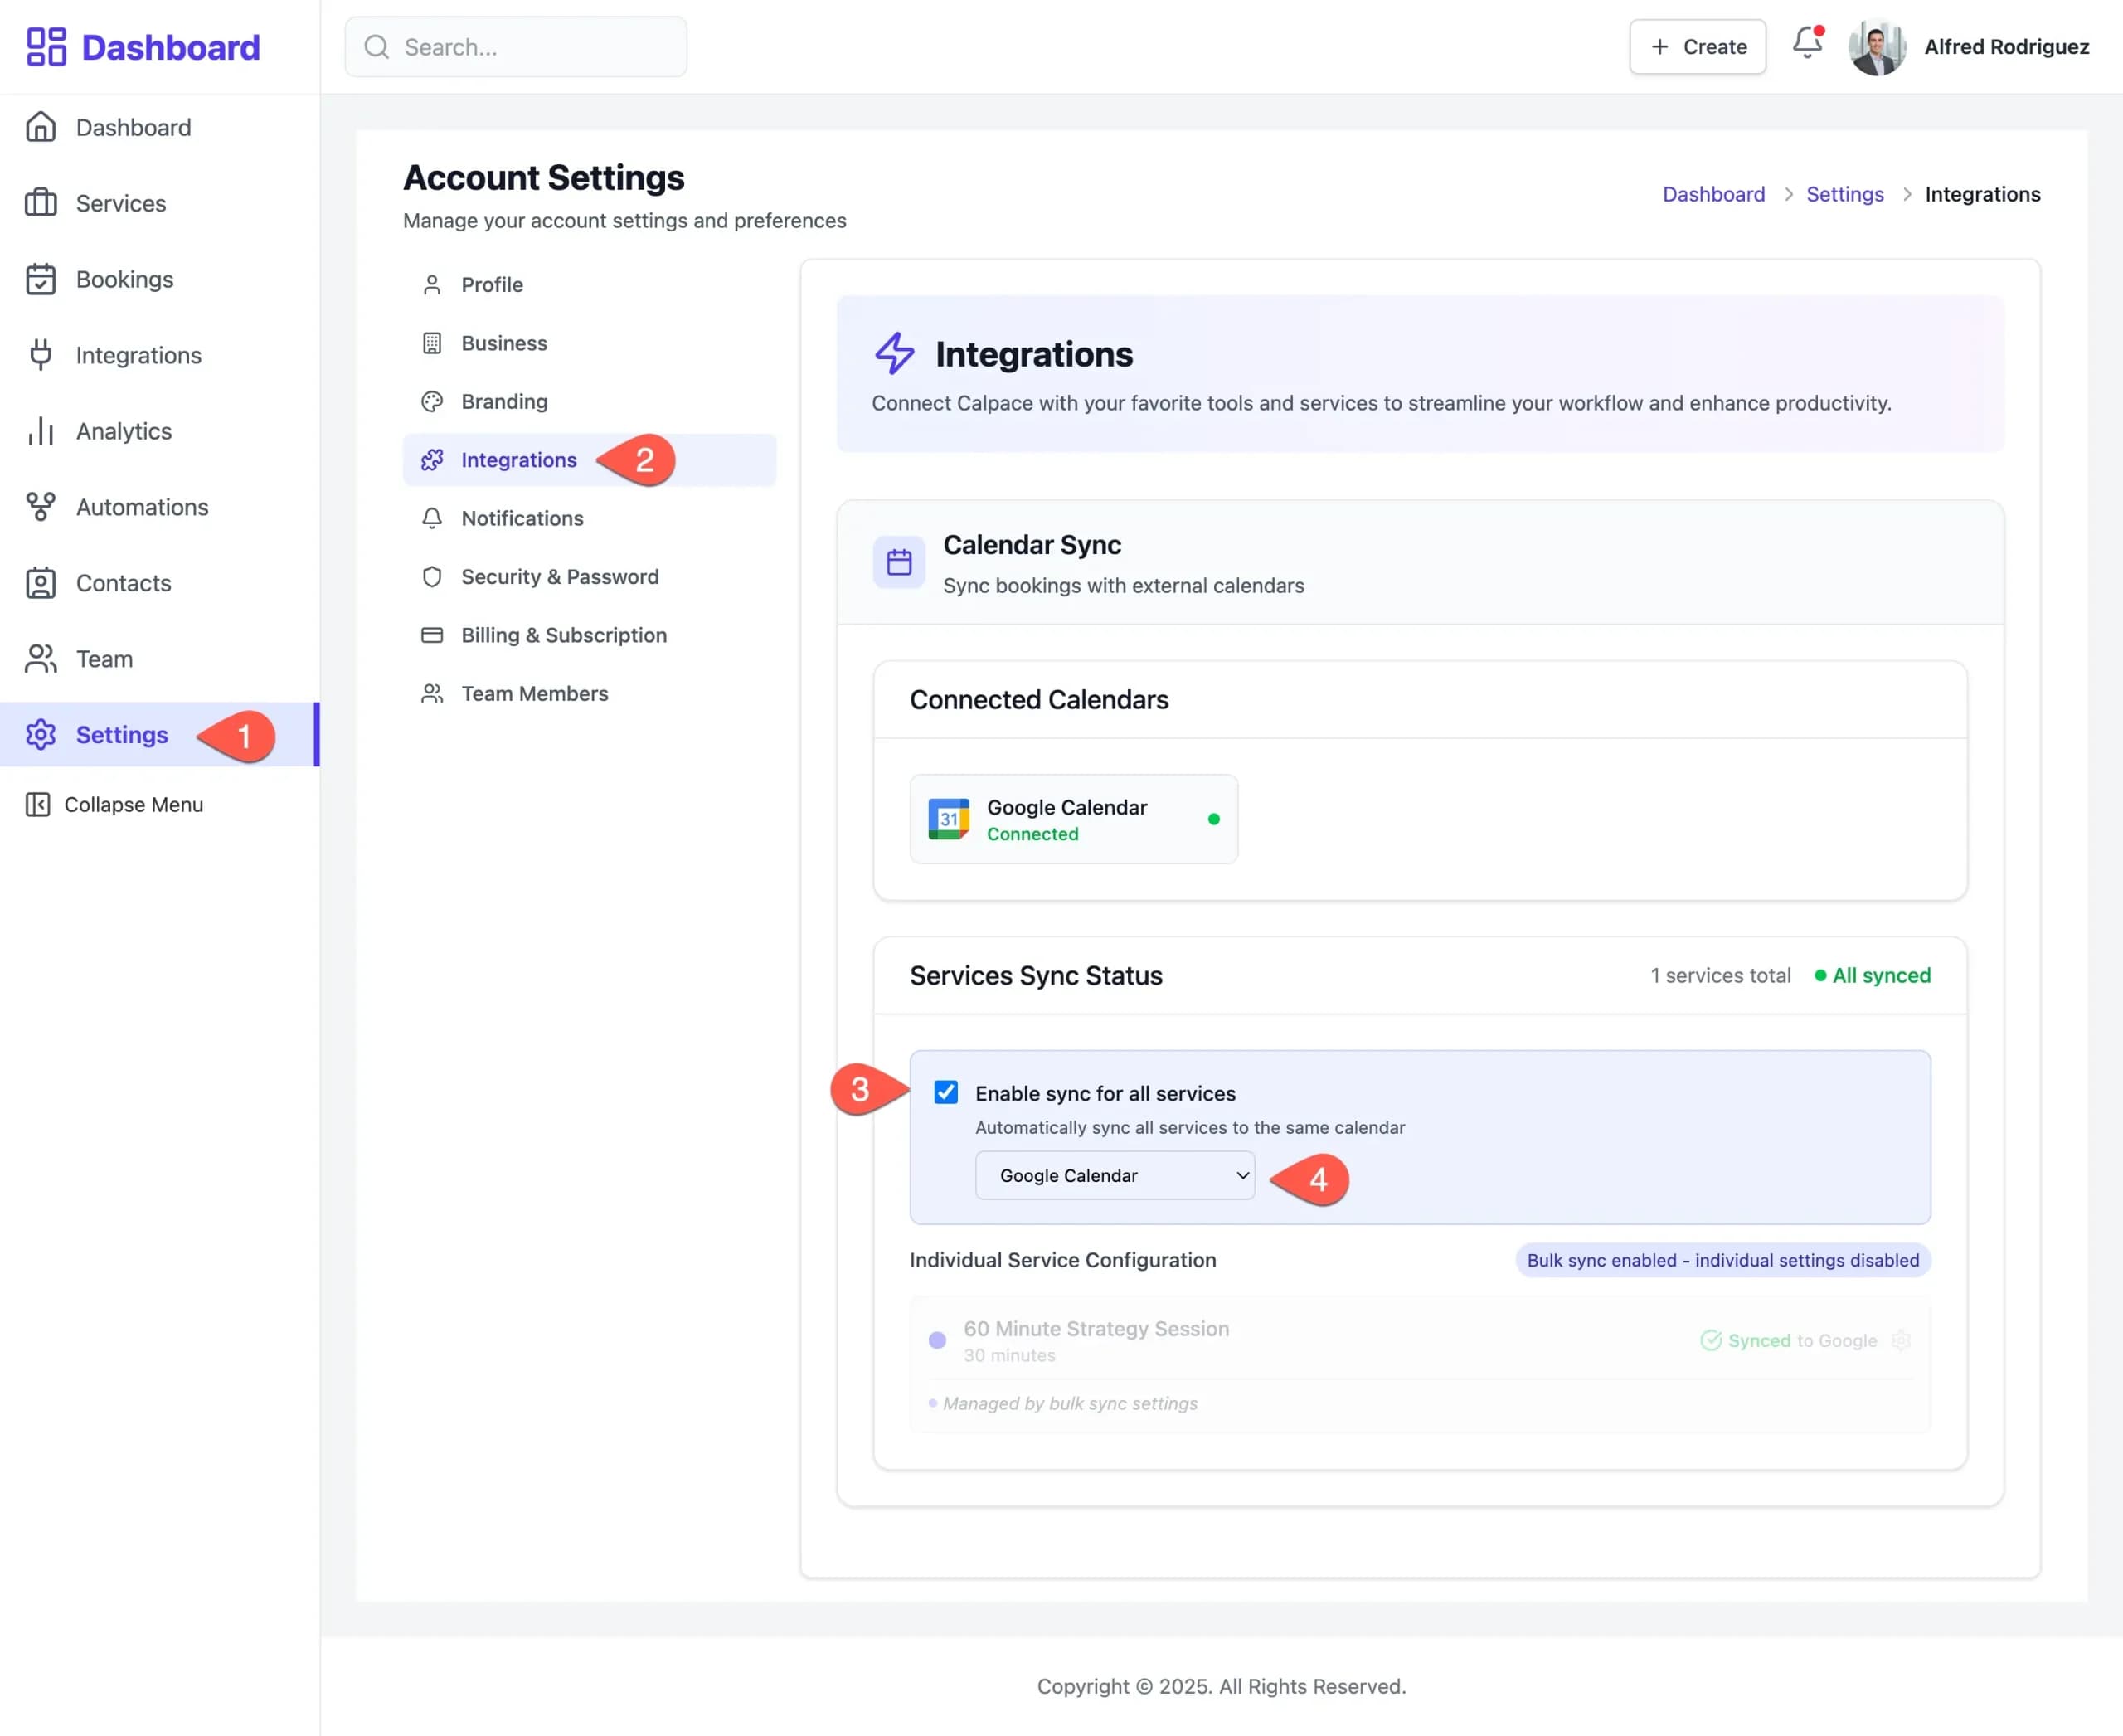
When bulk sync is enabled, all your services will sync to the selected calendar, and individual sync settings will be disabled to ensure consistency.
Your setup is now complete! Calpace will now check your Google Calendar for conflicts and automatically add all new bookings as events, keeping your schedule perfectly synchronized.