Setting Up Your Calpace Account
Welcome to Calpace! We're excited to have you on board.
After you sign up for your account, you will be guided through a simple 4-step onboarding process to get your business ready to accept online bookings. This guide will walk you through each of those steps.
You can track your progress at any time using the progress bar at the top of the screen.
Step 1: Tell Us About Your Business
The first step is to provide the essential details about your business. This information will be displayed on your public booking page for your customers to see.
- Business Name: Enter the name of your company (e.g., Innovate & Co.).
- Phone Number: Provide a contact phone number for your business.
- Industry: Select the industry that best describes your business from the dropdown menu.
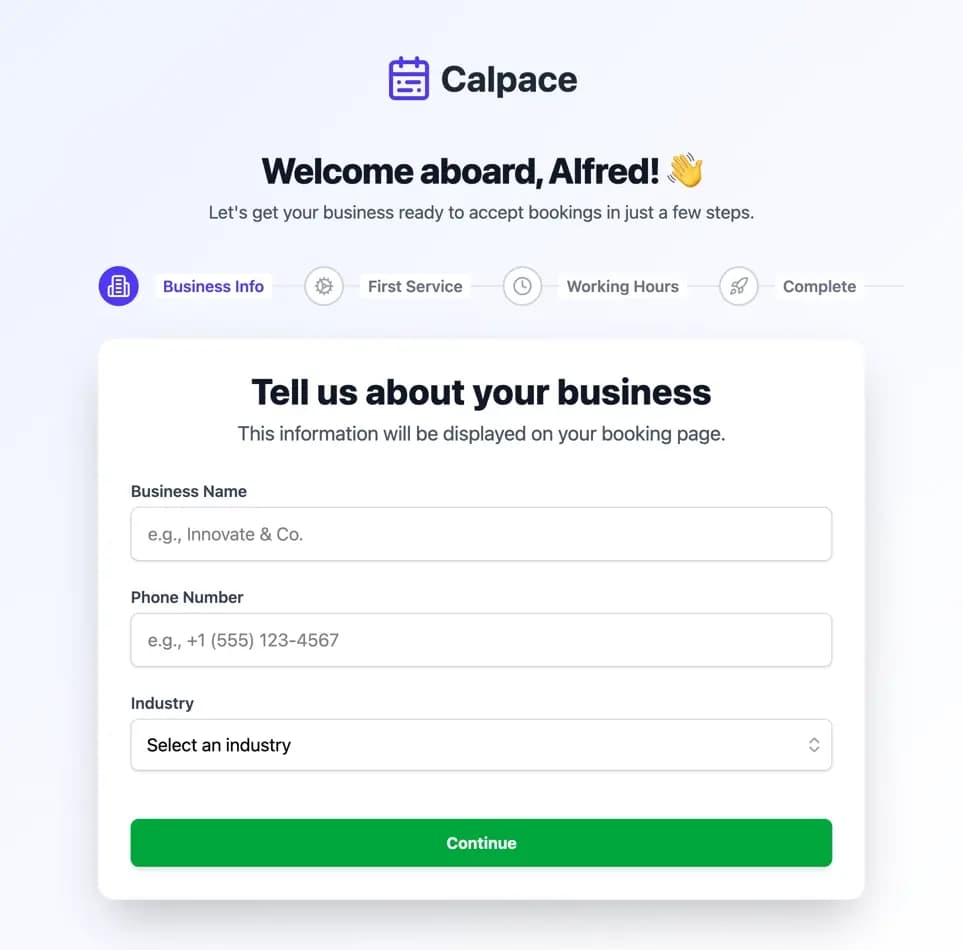
Once you have filled in the details, click the Continue button to proceed.
Step 2: Create Your First Service
Next, you'll define the first service you want to offer to your clients. This will be the first bookable option your customers see. Don't worry, you can add more services and edit this one at any time from your dashboard.
- Service Name: Give your service a clear and descriptive name (e.g., "60-Minute Strategy Session").
- Description: Write a brief summary of the service to inform your customers about what it includes.
- Duration (minutes): Set the length of the appointment in minutes.
- Price ($) (optional): You can set a price for the service. If the service is free (like a consultation), you can leave this field blank.
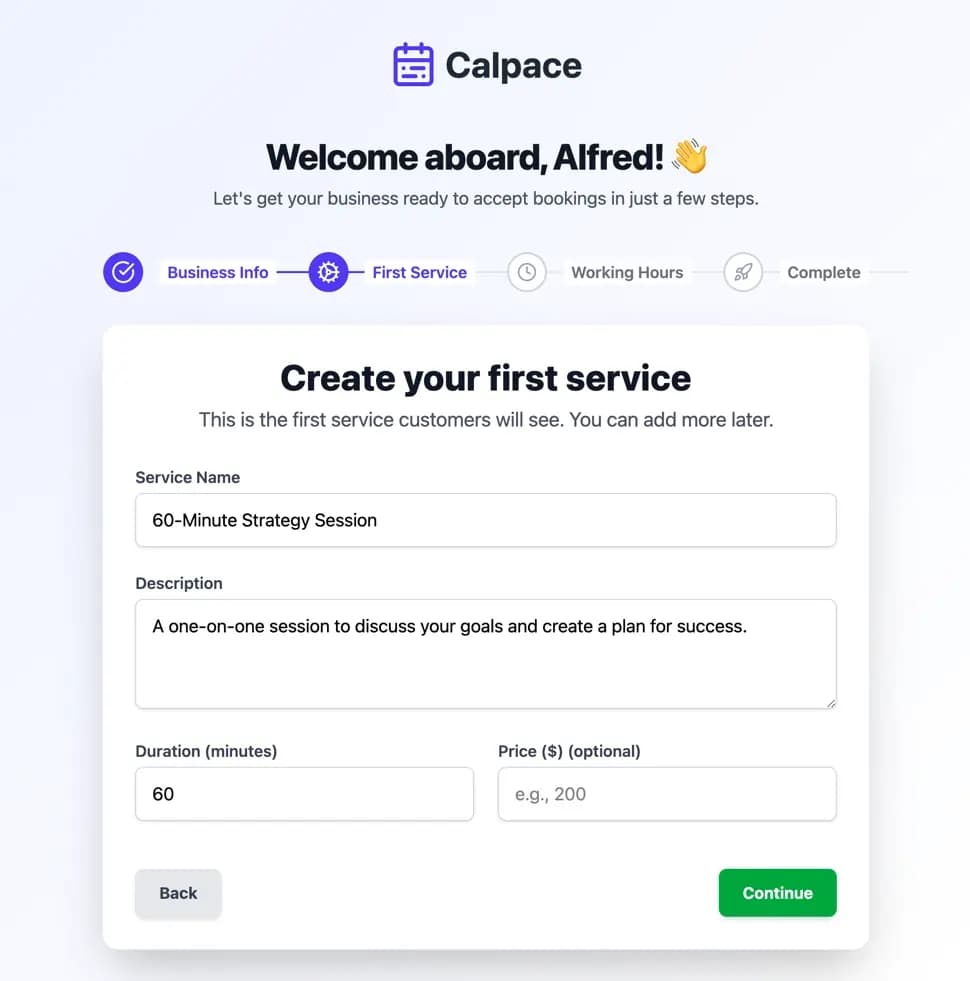
Click Continue to save your service and move on.
Step 3: Set Your Weekly Availability
In this step, you'll set your general working hours. This tells the system when you are available to be booked for the service(s) you offer.
- Days of the Week: Use the toggle on the left to activate the days you are available. By default, Monday to Friday are enabled.
- Time Slots: For each active day, set your start and end times.
- To add a break (e.g., for lunch), you can click + Add slot to create multiple availability windows on the same day.
- To quickly use the same time slot for all active days, set the time for one day and click Apply to all.
- Time zone & Time Format: Verify that your time zone is correct. You can also choose between a 12h or 24h time format for display.
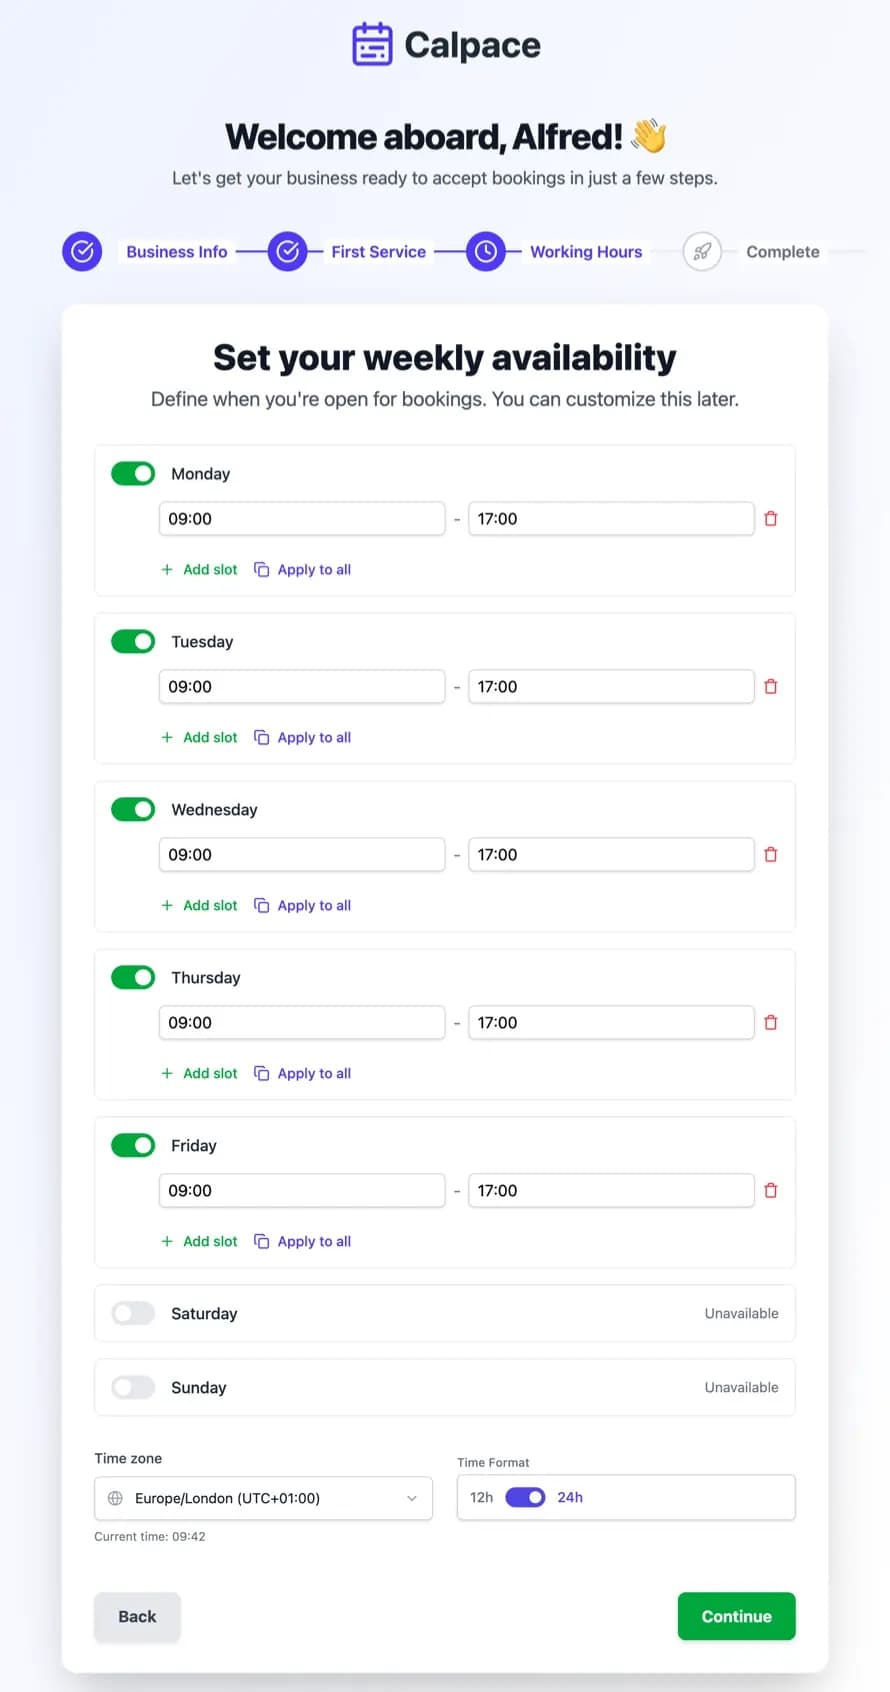
After defining your schedule, click Continue.
Step 4: Setup Complete!
Congratulations! Your initial business setup is now complete. You have successfully configured your business details, created your first service, and set your availability.
Your business is now ready to accept online bookings.
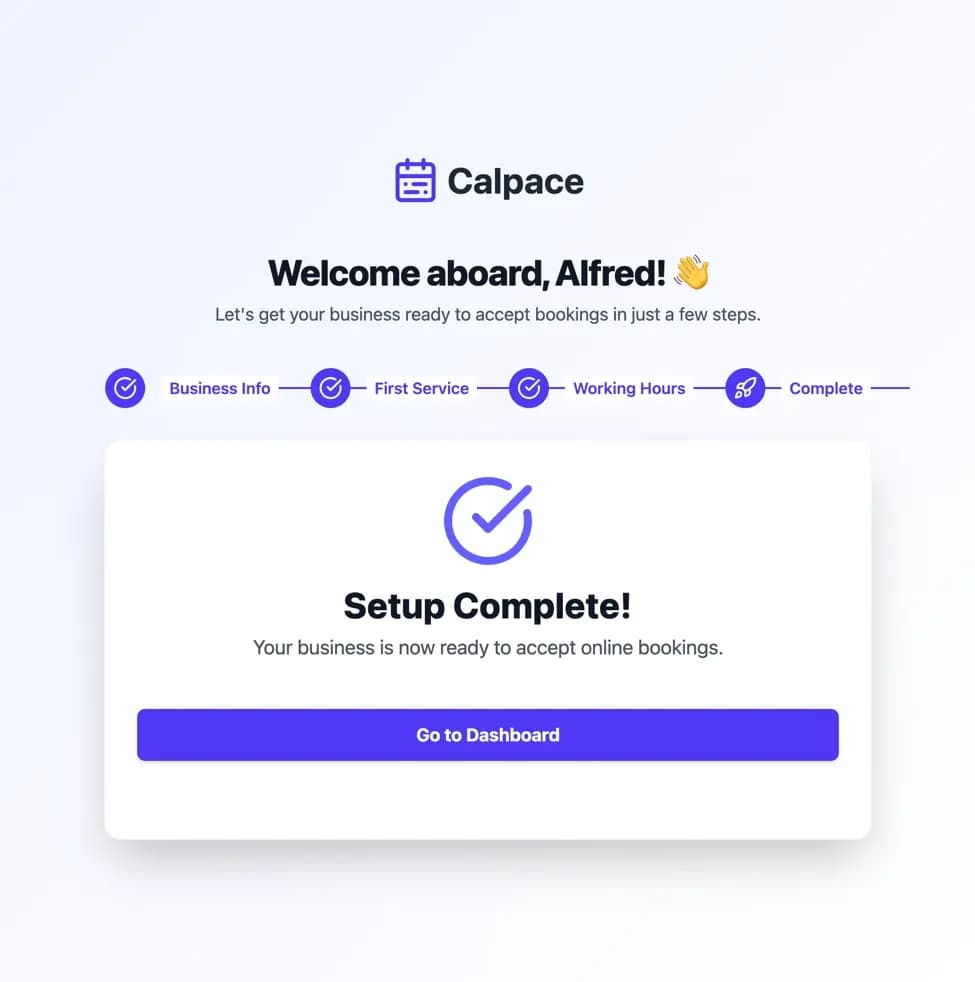
Click Go to Dashboard to enter your main Calpace account area. From the dashboard, you can add more services, customize your booking page, manage your schedule, and view your upcoming appointments. Welcome aboard!